Shot on iPhone

Comment

Shot on iPhone

Whilst this isn’t strictly a review, there are review like elements in it. :)

I had this idea years ago to create a travel show on how to get better images and videos with your smart phone and to prove it, we would shoot it all on iPhones.

I finally got off my rear end and shot a pilot for it at the start of 2020. Perhaps not the best time to be pitching a travel show, but oh well. Pilot turned out great! :)

Below are links to the pilot itself as well as a series of clips I shot talking about how we did it.

Enjoy!

This was shot as a concept for a series I am working on. If you'd like to know more about how and why it was shot you can see a series of videos I made about...

This is an introduction to how and why I made "The camera you have with you". Which is a pilot for a series that I was going to produce this year. Hopefully ...

In his video I take you through some of the camera challenges we faced in shooting an entire show on iPhones and how we overcame them. To watch the video I a...

In his video I take you through some of the audio challenges we faced in shooting an entire show on iPhones and how we overcame them. To watch the video I am...

Comment

Synology DS918+ The little RAID that can.

1 Comment

Synology DS918+ The little RAID that can.

The advent of digital photography has been amazing in that we are no longer limited to rolls of 12, 24 or 36 shots. Memory cards are as cheap as chips these days. The downside of this is that we are all creating a mountain of data with our photos and we need somewhere to store them.

I’ve got a ton of photographer friends who one day may be found buried under a stack of portable hard drives that they have lying around their office. A RAID solution can help prevent this possible fate and, at the same time, prevent many grey hairs from wondering “which hard drive is THAT file on?” and “Did I back that up?”, “When is that drive going to fail?” and “How can I share this with the client easily?” 

Designed for small and medium-sized businesses and enthusiasts, the Synology DS918+ is the little RAID that could. It’s compact, but don’t let its size fool you – it’s more than capable of being a great little addition to your storage and server needs.

It’s got all the usual Synology features – built-in AES-NI hardware encryption and capabilities including transcoding up to two channels of 4K videos at the same time, but this little box is probably more suited to photographers or those dabbling in 4K video and content, rather than someone working with 4K video content on a daily basis. It’s a great starter with in-built memory that starts at 4GB DDR3L but it is scalable up to 8GB, so don’t feel like you’re limited at all.

The main reason it may be a bit slow for video editors is that even though it can do 2 streams of 4K, you may need to do more. But if you’re editing in HD, then you should be fine.

Set-up is relatively simple. It’s not entirely idiot-proof though so it’s good if you have some IT experience, or at least if you’re familiar with some terms and troubleshooting. That said, most of my issues were more to do with the fact that we set it up initially using older hard drives which were from an existing Synology so it took the settings from that previous unit. This confused me at first, so mostly user error. 

But Synology’s set-up wizard and tools do make it easier than other systems and, if you don’t lose patience (ahem, like me), it’s pretty straightforward. I wouldn’t expect someone with absolutely no IT knowledge to be able to set it up, but if you’re relatively comfortable with computers, you’d be good to go.

As you can see from the screenshot below. Once you log in via a web broswer it looks like the desktop of a computer and works pretty much the same way.

Screenshot 2020-01-22 19.20.06.png


A nice touch is that it is a tool-less process to install hard drives. You simply pop out the bays. Then there are two side panels you need to pop off, put in the drive, put the side panels back on to hold the drive in place. Then insert the drive.

We have it set up at the moment with 12TB of hard drives which gives us 8TB of storage and uses 4TB  for redundancy but it can be scaled up or down. There are four hard drive bays and the drives need to be installed in pairs – so you can start with four whatever GB/TB drives and then, if you need more storage, replace two of the drives with larger drives etc etc. And if you find that you need even more bays, well, you’re not limited by the four bays that are built in. If you add the Synology Expansion Unit DX517, you can scale up to nine drives if your photo library demands the space. The DS918+ also supports up to two M.2 NVMe 2280 SSDs, which allows fast system caching without using the internal drive bays – which, in layman’s terms, means that you can install them and the RAID will work even faster because your most used data will sit in the cache while you’re working on it. 

Once you’re set up, well, it’s a breeze. Easy to copy content across and it’s a great little server. It’s really great to be able to access on the go, especially if you have big files to share with clients, since they can access them from anywhere if you set up a login for them. I use a range of file-sharing platforms but they’re often limited in terms of storage and access so this is a great way to share photos or videos with clients without having to worry about it. I particularly like the fact that I can set up a limited access account and remove access once the job is complete so I know the rest of my files are secure too. All from Synology’s phone apps.


Screenshot 2020-01-22 19.20.56.png

And remember that 4TB of redundancy I mentioned earlier? This is really quite key because it means that this is a great backup system too. While you wouldn’t leave all your photos on one single RAID (because, as we all know, if it doesn’t exist in at least three places, it’s not backed up) but at least in this situation, if one of the hard drives fails, you can quickly replace it and not lose anything at all. Consider it a bit of “self-care” for your sanity!

But the big question is: can you work directly from the RAID? The TL;DR answer is yes! If you’re accessing the server remotely via a wireless connection, you can work directly on your JPEG files easily, but connect via a wired connection and you can even work on RAW images as if they were on your internal drive. No lag, no issues. This makes it really key for your workflow.  And since you can really store everything on the RAID, there’s no more wondering “which hard drive did I keep that client’s work on? Did I label it? Did the label fall off? Am I doomed to check every single drive I own? WWHHHYYYY!!!”

Another nice feature is that the Synology DS918+ has a USB port right at the front which means you can copy images or video – any files really – directly onto the RAID without having to save them elsewhere first. It’s another way that this little RAID that could really simplifies your worklow.

I know there are 2 unit RAIDs out there, and you can look at those. But I would suggest you want at least a 4 bay unit. It gives you far more storage options and better speeds. This is because the more drives you have in a RAID the faster it will be.

The Synology DS918+ is a great entry-level Synology server if you’re starting out with 4K files and want something to back-up your files, store your data and allow you to access your files from anywhere. If you haven’t dipped your toes into the world of RAIDs and you’re looking around at the mountain of hard drives on your desk or your shelves, do yourself – and your workflow – a favour and get the little RAID that could on your desk. 

Screenshot 2020-01-22 19.22.50.png


1 Comment

Comment

ATOM Raid 4TB SSD portable drive from Glyph review

atomraid-lineup.png

I’d been eyeing up these Atom drives for a while, but they are pricey. So, when they went on sale, I grabbed one to see if they could be as good as I suspected. Read on to find out how it performed.

Something that is becoming absolutely essential for all video editors these days is larger and faster storage. As 4K video and Raw video become more the norm. They used to be something you work with on one or two projects per year. It’s becoming more and more important and necessary for even a basic setup.

ATOM 4TB SSD RAID

The Atom Raid is a SSD hard drive made by Glyph. The drive is designed to be one of the fastest units in its class. The 4TB SSD is said to give you up to 950MB/s which is fast, very fast. It does also come in 1TB and 1TB models.

For the last year or so I’ve been using the Samsung T5 SSD drives and they’ve been great, but the problem is that they only go up to 2TB. I’m sad to admit that 2TB just isn’t enough anymore for some of the projects that I’m working on. Since I started shooting a lot more ProRes RAW footage, almost all of my projects go larger than 2TB.

So I needed something portable, bus-powered, fast, and larger than 4TB. Enter the Atom Raid. You see, Raid is how Glyph manages to get you a 4TB drive in a single enclosure. They actually have two SSDs in there that are striped at Raid 0. This mean your computer sees them as though they are a single drive and it is FAST!

SPEED

I only got the “up to 950MB/s” when I first plugged it in, as most drives will slow down a bit once you start putting data on them and, well, using them. The Atom slowed down to giving me 850MB/s on average, which is not too shabby I am sure you’ll agree.

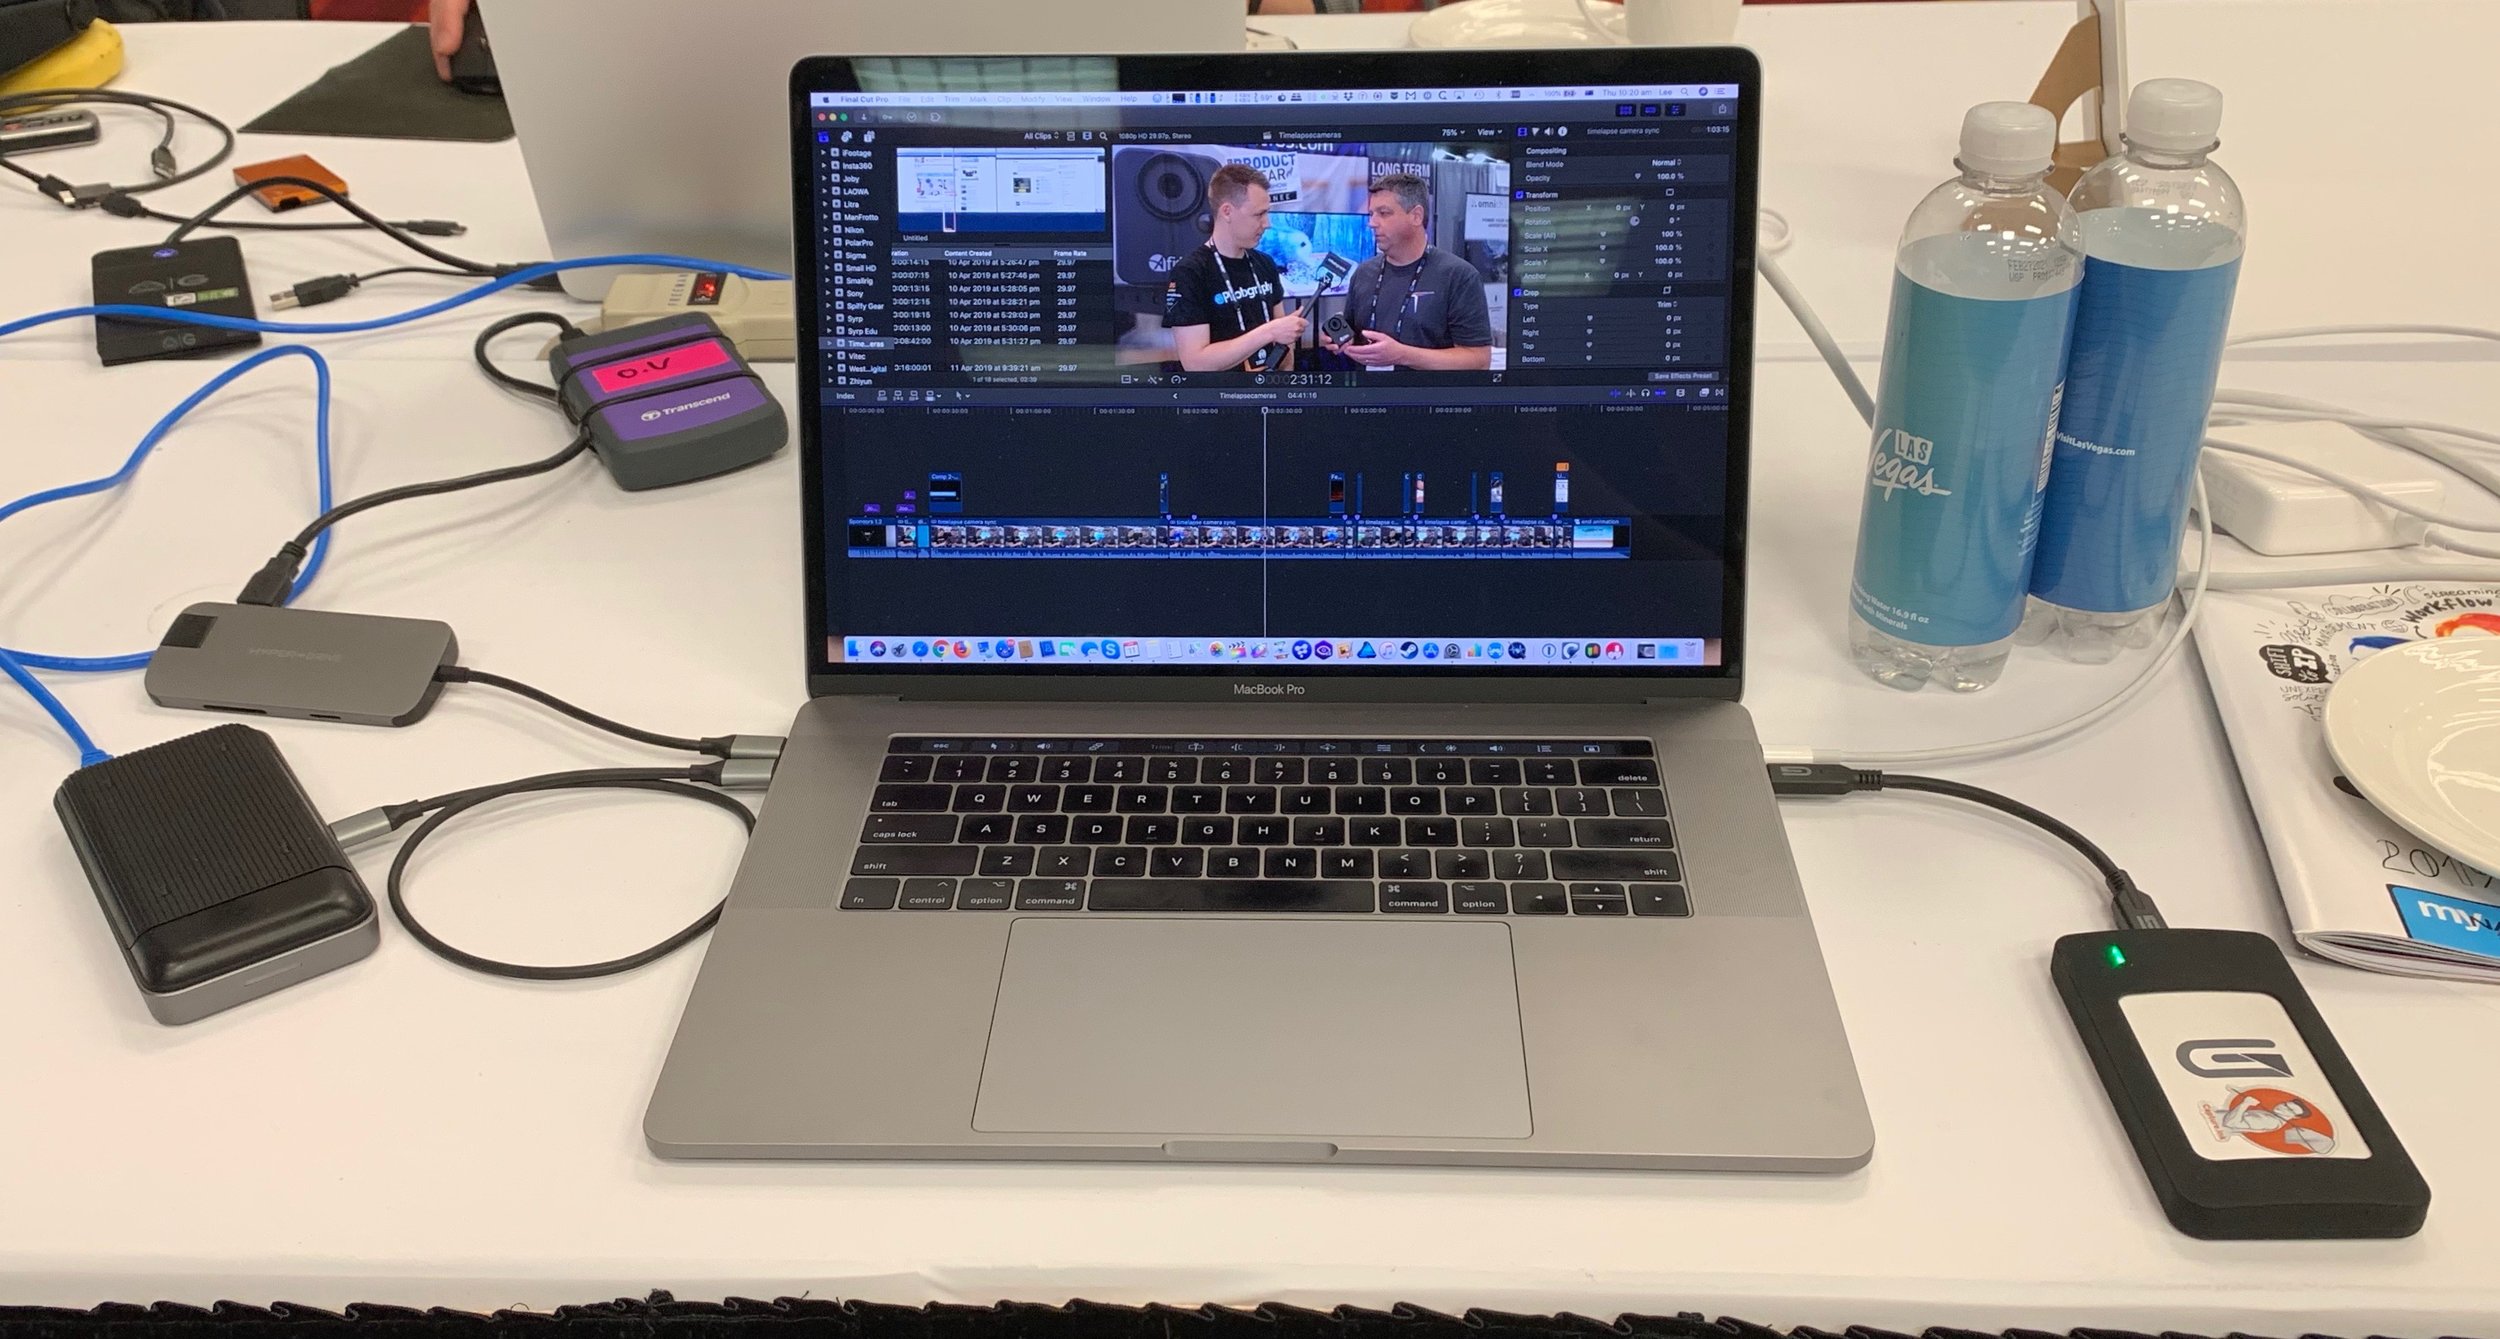
It connects via an included USB-C cable and also comes with a USB-A to USB-C cable for those who don’t have USB-C yet.

So, it’s got lots of storage and it’s fast, but why else am I gushing so much about it?

It has no fan, so it makes no noise, which is handy when you’re editing video and don’t want to be distracted by fan noise. Even without a fan, it stays relatively cool. It does get warm, but never hot. I tested it recently as my edit drive when editing all the stories you would have read from DIY’s NAB 2019 coverage. It was being slammed hard all day for four days straight and it never missed a beat or got too warm that I couldn’t pick it up, put it in my pocket at the end of the day and head out.

IMG_2817.jpeg


The last thing I’ll mention is how small it is. When you get one, you won’t believe that Glyph has managed to get something this small and yet it has 4TB of storage.

How much I like this drive is almost embarrassing. The only negative I can find is that it really isn’t cheap, but SSD isn’t cheap, and I can see how in about a year or two I am going to need a 8TB unit. 

Comment

Photography Workshops

Comment

Photography Workshops

A mate of mine has started a new website, which is a pretty cool idea. It’s a central location where people can find and book photography workshops. Of course most of them are in amazing locations with amazing photographers. The site is www.fstoptours.com. This got me thinking about Photography workshops in general.

I haven’t been on many photography workshops, but those that I have been on have been really good. Here are some of the obvious and some not so obvious things that I’ve gained from them.

Education

This one is kind of obvious, but will depend on the type of workshop you are going on. A travel workshop will generally involve maybe a day or more of classroom type training and then multiple days of hands-on experience. Others that I’ve been on have had about 30 minutes of classroom type training and then the rest was all practical. The way you prefer to learn will dictate which of these work best for you, but it’s worth looking at the itinerary of the workshop to see if there is enough, not enough, or too much classroom type training for the way you like to learn.

To be blunt, I’ve found the educational side of some workshops not the best. Training or educating itself is a skill. I’ve been on some workshops with some amazing photographers who are not the best teachers. It’s hard to tell what someone is going to be like before you actually go on the workshop, but you can get a bit of a feel of things from checking out their website and if you can find any articles or video tutorials they have online that can give you an indication if their teaching style is going to suit you. It may also be that the photographer running the workshop is not the best in a classroom-type environment but is amazing at giving out tips and tricks once you all get out with cameras and are doing the practical stuff.

P2180475.jpg

Practical

The actual going out and taking photos is the reason most people go on a photography workshop. There are some basic skills that are the same that you’ll learn across all workshops, but there will also be very specific things you’ll learn depending on what kind of workshop it is.

For example, when my wife and I did a workshop with Valerie Jardin a few years ago, one of the things I really wanted to learn was some techniques for how to approach people for street photography. I have always really liked “candid” street portraits. But I was very nervous about approaching complete strangers in the street and asking if could take their photo. Valerié was great at not just giving me some advice on how to approach strangers to take their pictures, but she also did a lot for just giving me the confidence to go out and do it.

Most people learn best by doing, so it’s also great to get hands-on experience whatever the subject matter is. It’s like all those times that you’re out with your camera, you can’t quite work out how to do something and magically when you’re on a workshop, you’ve got an expert right there to talk you through what you need to do. Sure you could Google it, but there’s no substitute for actually having a living person right there that you can interact with.

DSC_0243 (3).jpg

Travel

If you can afford to do a workshop in some far fly corner of the world, that’s great. But it doesn’t have to be that exotic. Doing a workshop in your own city can introduce to areas that you never knew existed or can even give you a whole new perspective on an area you’ve walked through a thousand times. There is also the advantage of being able to sleep in your own bed and not having to deal with jet lag. Although if there are other participants in the workshop from out of town I’d suggest seeing if you can find out before the workshop and maybe make a holiday out of it and stay at the same hotel, which also helps build a sense of camaraderie. I’ve also found those late night random conversations with the other participants some of the best learnings I’ve had from workshops so if you go home every night, you could miss out on those.

Having said that, if I had the option of doing a workshop in my own city or Cuba, Japan, Namibia, New Zealand, Finland, Iceland, Vietnam or Hong Kong, well let’s just say that my own city would not be top of that list. 😉 

DSC00336.JPG

Being with other like minded people

This brings us onto the third and possibly best advantage that you get from going on a photography workshop. Just spending a few hours or a few days with like minded photographers is priceless. My wife and I have made lifelong friends from the workshops we have been on. It’s amazing to spend so much time with people who have the same passion as you, learning how to improve you skills and having loads of fun along the way.

Something else that I’ve noticed when I go on a workshop, for about a week or two afterwards my photographic eye is IN. Because I have been so utterly immersed in the world of photography for 12-16 hours per day for multiple days my brain is totally in photo mode. So I notice angles, and light and patterns and shots that I may not notice when I am in my usual weekly grind. 

Recap

I guess there are not prizes for guessing my thoughts on workshops. Even if you think you know just about everything there is to know about the subject matter, I can assure you there is always new tricks you can learn and use. I find a lot of those to be super practical, since most of the time on a workshop is spent doing as the way that you learn, instead of being a classroom the whole time.

Along with the learning, it’s the people and ideas that you come into contact to. Mostly everyone is there because they love the thing that you’re all learning about and doing, so everyone has the same passions and you have some amazing conversations and perspectives to see.

Finally, if the workshop is combined with a stunning new or even old location it’s another helpful way to get yourself out of your comfort zone.

DSC00773.JPG

Comment

Sachtler Flowtech 75 Tripod hands on review

Comment

Sachtler Flowtech 75 Tripod hands on review

I remember once I was chatting to two friends of mine, one a stills shooter and one a video guy. I and the video guy were talking about a new “lightweight” video tripod that had just come out and we were talking about how impressed we were that it only cost about $1500. At which point the stills shooter spat out his coffee and couldn’t believe that a tripod could cost so much. But for video tripods that is super cheap.

Tripods are super important in the work that I do. I love shooting hand held or on the shoulder, but sometimes, a lot more lately, my setup is just too heavy to carry all day long. Also it helps sometimes to not have that “shackey cam” look.

A video tripod is not like a camera that you buy a new one every 3-4 years, or for some of us even more frequently. Video tripods are a bit like lenses in that they are long-term investments. You may buy one and not need/buy a new one for the next 10 years.

So what’s the difference between a stills tripod and a video tripod?

  1. They are heavier.This may seen obvious, but generally a video camera setup is going to be heavier than a stills setup and so you need a tripod that can hold more weight. With it needing to hold more weight, of course the tripod itself is going to end up being heavier. The other reason it needs to be heavier is that a stills tripod just has to hold the camera still and steady as you take a picture. With video, often, you’ll actually be moving the camera either for a side-to-side pan or a up-and-down tilt. The tripod has to be extra steady while you are moving the camera on it. Thirdly, the tripod needs to be sturdier because your tripod head is going to be a bit more complex for video. These days video heads are fluid heads which use fluids to give resistance when letting you move the camera smoothly.
  2. They cost more.Once again, the reason here is pretty obvious. Video tripods are more complex than stills tripods and need to be tougher. This kind of engineering costs more.
  3. They normally have a bowl that the head will fit into. This makes it really easy to quickly adjust the level of the head and get it straight on some pretty funky angles.
IMG_3486.jpg

So when it comes to tripods for my video work, I am looking for something that is super sturdy, yet not super heavy and easy to set up and pack up. That’s a big wishlist, I know.

BUT enter the Sachtler Flowtech 75.

This is a carbon fibre tripod that tries to rethink how tripods work. Let’s first talk about the standard features it has.

Features

It weighs a relatively light 3.5kg with feet and mid-level spreader but without the head. There are a load of different heads to choose from, more about this later.

It can go as high as 153cm and as low as 26cm, which is a good range.

It has three locking levels for the legs so you can get very close to the ground if you need to and you can do it pretty darn quickly.

It can handle a payload of up to 20kgs, which is way more than what my back can handle, so we’re good there.

A really cool little feature is that when you are storing the tripod it has magnets toward the bottom, so when you close the legs together they just “click” together and you don’t have to fiddle with plastic or materials to get the legs to stay together during transport.

Speaking of transport, the tripod folds down to a height of 67.4cm without the head, which fits perfectly in my ThinkTank transport manager 30.

It has rubber feet that sit on top of metal spikes. You can use the spikes in soil and such and the feet just about everywhere else. The feet are really easy to get on and off, which is another nicely thought out feature.

I went with the Ace XLhead which only has a payload limit of 8kgs but since I really like my setups as light as possible I figured this would be ok. Also this was one of the lightest heads available coming in at 1.7kg. Initially, I wasn’t sure about it as it feels kinda cheap and plastic, but it has performed beautifully. It uses a standard Manfrotto 501 type plate, which is nice as surely most of us have a few of those lying around.

The show-stopping feature though is how you can quickly deploy and adjust the height of the tripod. There is a red plastic “tab” on each leg and you simply flick it up and the leg just drops to the ground, or you just lift the tripod. So getting set up is as easy as three flicks, lift and then flick the tabs back down. This is an awesome feature for folks who often find themselves working on their own.

IMG_3692.jpg

Hands on

I recently got back from a shoot in the Galapagos Islands and one of the big challenges on this shoot was time. I was shooting footage for a medical conference and so while I was there to capture behind the scenes footage, I had to work around the schedule of the conference. So when the group had to move on, I had to be able to grab my camera, pop my tripod on my shoulder and move onto the next location. Then once I got to the next location I had to be able to set up as quickly as possible since I had limited time to shoot in each spot.

Now I know about 4kg for a tripod seems heavy to schlep around an island along with a camera, but it’s actually about 2-3kgs lighter than my previous tripod, which made a huge difference.

Conclusion

At $1282.50 USD for the legs alone without a head, I can see how this may seem expensive if you’re coming from a stills background. But for video folks, this is actually a really well-priced tripod. The only drawback for some shooters is that it doesn’t have a high enough payload that it can handle. This is not an issue for the way I shoot and I absolutely love the mechanism they’ve developed for deploying and adjusting the height.

Compared to other tripods in this range, it is also one of the lightest around, which is a great feature.

Not only do I really like this tripod, I think I can see a second one in my future.

IMG_4011.jpg

Comment